As the name suggests, it’s a content recognition app from Google that can collect information from any image. It has many ways in which it can be helpful, for example when you’re in a different country and all the signs you see are in another language, you can just click a photo of it using Google Lens and it’ll translate it for you instantly. There are various other ways in which it can save the day for you. For instance, it can:
Turn your handwritten notes into text 📝Give you the meaning or the pronunciation of a word on the image 🔍Help solve math problems ➕Read book summaries with just the cover of the book 📖Track your packages when you click a photo of the shipping details 📦Identify pet breed 🐕Pull up recipes from the food product 🍲
All of this can be achieved by just providing an image and leaving the rest to Google Lens. Now, if you’re an iOS user, you must have thought at some point if you can use Google Lens for iPhone, and the answer to that is yes. Not the usual way but there’s a workaround to it.
Why is Google Lens not available on iPhone/iPad?
This is a big question that can arise in any iOS user’s mind if they’re looking to use Google Lens on their device, as we all know Google Lens isn’t officially available on iOS as a dedicated app. The most logical reason behind this would be that Google wants to keep the app exclusive to Android users to use it as a selling point. From the company’s point of view, this is not a bad decision, but for iOS users, it can seem like a bit of a disadvantage. However, you don’t have to feel that way because there are official ways to use Google Lens on your iPhone and iPad. Depending upon how you plan to use it and on which device, follow the steps mentioned below.
How to get Google Lens on iPhone using Google app
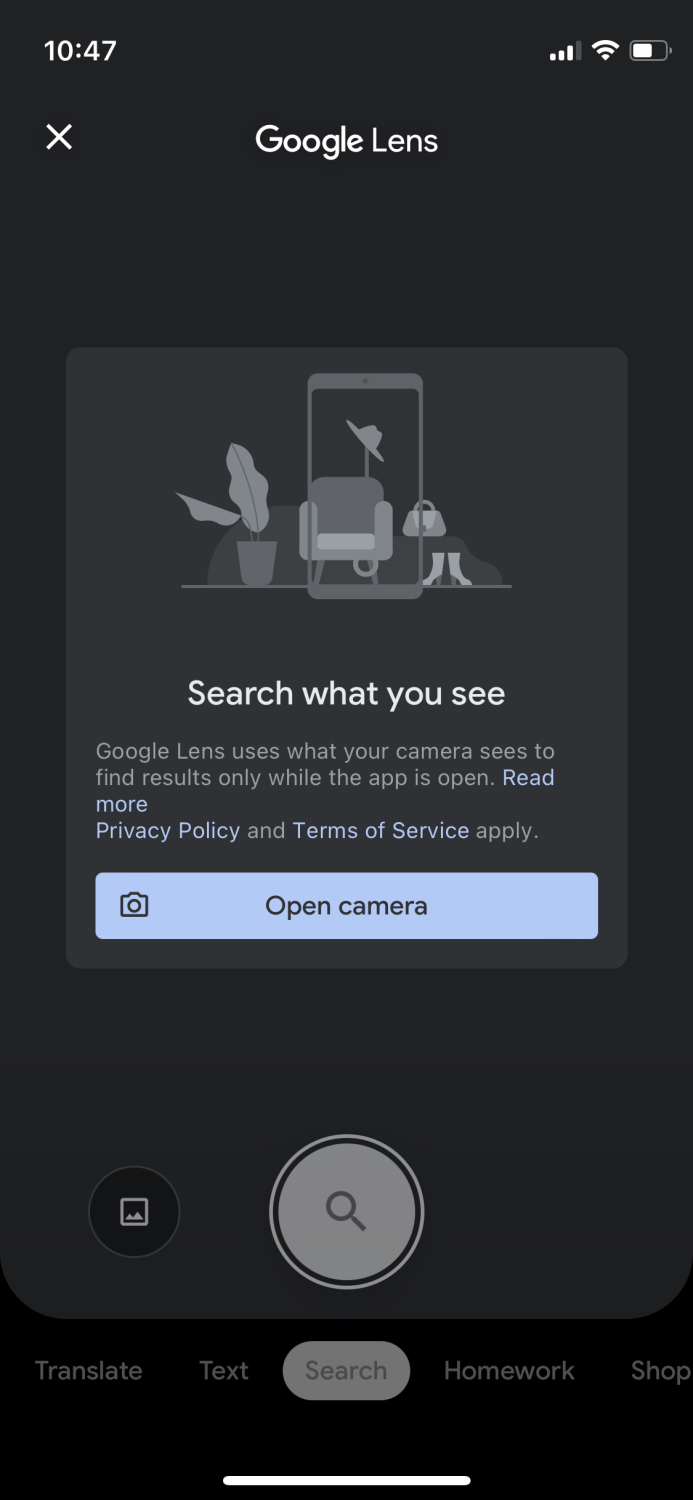
The first method is to access Google Lens from the Google App. It can be downloaded from the app store, and once you’re on the app, tap on the camera icon beside the microphone icon. Once you click on it, you’ll see a small message like this. Tap on “Open Camera”. The app will ask you to grant permission to access the camera. Tap where it says “OK” to continue. Now you can point your camera anywhere and perform various tasks like translating, transcribing the text, shopping, etc. by just clicking a photo. This is the easiest way to use Google Lens on your iPhone.
How to get Google Lens on iPhone and iPad using Google Photos
Since the above method only works on iPhones and not on iPad, you can try this method below to use Google Lens on both devices. Start by downloading the Google Photos app from the app store and open it. You’ll see a screen like this which will ask you for permission to access your photos. Tap on “Allow access to all photos” to proceed further. Once you’re past that, you’ll see it opens your media gallery from which you can select the particular photo you want to use. You can also click a new one from the camera app on your iOS device and then come back to Google Photos to select it. Once you’ve selected and tapped on your desired photo, it’ll open it and you should see a screen like this that has various options on top and bottom. You need to tap on the Google Lens icon which is the third icon from the left on the bottom. Now just wait for it to scan and retrieve any desired information you want.
Conclusion
Those were the two best methods to use Google Lens on iPhones and iPad. I personally wouldn’t recommend any other backdoor access to this app when you already have official ways to use it. The best thing is that you don’t have to do any crazy amount of steps or downloaded multiple apps to make it work. Additionally, you might also want to check out these mobile scanner apps that are AI-powered.


